Say goodbye to problems with DRM copy protection!


You may have a habit of watching videos on number of different devices due to DRM protection. Few devices are produced by Apple, such as Apple TV and iPad, while other few are made of Sony, Panasonic, etc. You want your media to be portable. Also, you want it not just portable in the sense that you can carry it when you travel, rather portable in the way that you are not restricted on the specific types of devices that could play any video. It is where DRM (Digital Rights Management) come in. If you purchase video from iTunes movie store, the file will come featured with DRM that keeps you from playing that movie on anything else but Apple devices.
There are two different ways available to copy TV shows or iTunes videos on your local hard drive to transfer those videos to all types of devices to play. For example, you can make use of video recorder tool for recording the screen if you playback the video on iTunes. By this way, the recorded video would not be protected by DRM any longer and you can move it to tablets or any of your android phones for enjoying. But, there is an issue exists to be met before you choose record a HD movie rented or bought from iTunes. The quality of output video may not be achieved as that of the original movie. Moreover, sometimes the video and audio will not be synchronized in recorded video.
You want a better solution in order to get rid of DRM of iTunes video. You should need a viable solution to remove off DRM from iTunes video, while getting non protected video with no quality loss. This can be achieved by means of AppleMacSoft DRM Video Converter available for Mac. This software allows you easily remove DRM off iTunes video so that you can play the video file on any devices you like without any restrictions or DRM protection.
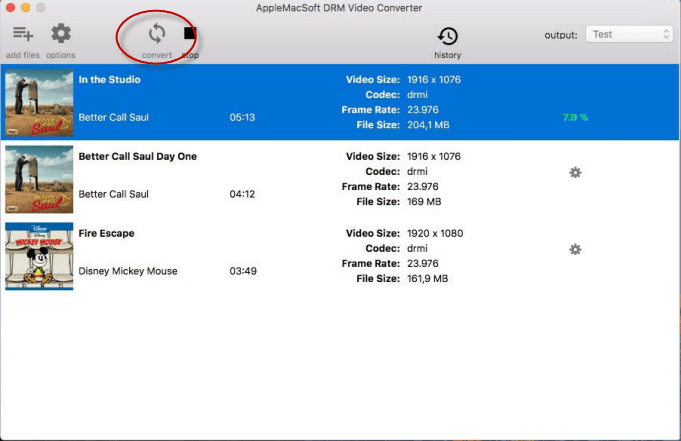
Step 1 – After the software is downloaded, launch it and iTunes will automatically be launched. You will find DRM Video Converter main interface. Now click the "add files" button in the top-left to add the iTunes videos you want to remove the DRM protection from. You will find the list of all available iTunes M4V videos. Choose the iTunes protection video files you need to import and then click add button.

Step 2 – Choose where to save. By default, Output MP4 videos are saved to Documents/AppleMacSoft DRM Video Converter/Converted folder. You can change this in the Options window or You can click the drop-down icon on the top right corner of the main interface.

Step 3 – Click the convert button on the toolbar to start removing DRM from selected iTunes videos, Wait until the conversion process finishes.

Just three simple steps, you can finish removing DRM protection from iTunes videos with ease, then watch the purchased or ranted M4V videos on other devices and players or share the iTunes M4V videos with your families or friends freely. So why don't you download this DRM Video Converter for a try today?
![]() Mac OS X 10.8 and later
Mac OS X 10.8 and later
You can immediately download the latest version of the DRM Video Converter and start to removing DRM protection from iTunes videos right now !
