
 Should I choose RAW format or JPG?
Most of the digital SLR cameras can shoot RAW and JPG format, but what exactly is RAW format? What are the advantages and disadvantages compared to JPG? Should we store photos under RAW or JPG? Let’s try to understand it.
Differences between RAW and JPG:The RAW image format is basically an image source file that has not been processed. It stores the original information captured by the digital camera, and there is no loss of information due to image processing (such as image sharpening, increase color contrast) and file compression. But we need to use dedicated software to open these files.
Many of today's digital cameras can shoot RAW format, but different manufacturers are using different extensions and formats, such as CR2 or CRW (Canon), NEF (Nikon), ARW or SR2 (Sony), RAF (Fujifilm) Etc., these manufacturers use own software to handle their RAW photo format.
Another common format is JPG, the camera will base on the user's settings for image processing, compression (based on quality setting in the camera) and storage.
RAW is a commonly used format by professional photographer because it preserves original information, allowing significant post processing task by users, such as adjusting white balance, exposure level, color contrast settings; it is especially helpful for novice to remedy failed photos, and the photos are able to be restored to original state regardless of any changes from post processing task.
Another benefit of RAW is the ability to correct loss of light and deformation from lens by using Canon DPP software.
JPG is a very popular image format and commonly used by almost all modern digital cameras, most computers are able to open the JPG files, the user are allowed to set the degree of compression to retain the level of quality (the best JPG quality is very close to RAW), so it is a very convenient format.
If you have previously taken pictures in RAW format and unable to open them from your computer or mobile phone, you should consider converting them to popular image formats such as JPG, GIF, Tiff or PNG.
At present, there are a lot of software able to convert RAW to JPG, but it is very important to select one that is useful and professional, so we introduce to you how to use AppleMacSoft Graphic Converter. This software is able to batch conversion from RAW to JPG file with ease. Below are detailed step by step instructions:
Step 1: Download the software from the following links and install it on your computer.
Download Graphic Converter for Mac (version: 1.3.1 , size: 3.1 MB)
Download Graphic Converter for Windows (version: 1.3.1 , size: 2.1 MB)
Buy Graphic Converter Now $19.95 USD
Note: AppleMacSoft Graphic Converter does not support macOS 10.15 Catalina or later. if you are using the latest version of macOS, You can download and try FotoGo - Batch Image Converter and Editor.
Step 2: Open the software and the main interface is as follows:

Step 3: Click the "Add images to convert" icon at the top left corner to import the RAW photos that you want to convert.

Step 4: You can set the output parameters at the right side of the interface. Select JPG as the output format and specify a location where the output will be saved.

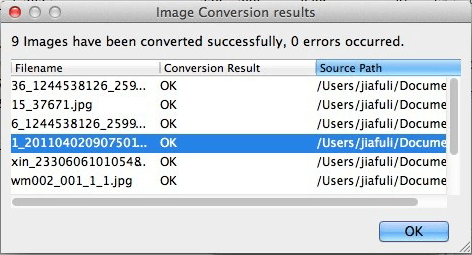
Step 5: Click the Convert button and the program will quickly convert RAW photos to JPG format. The conversion just take a few seconds unless you are converting more than a few hundred files.

Converting RAW to JPG format is extremely simple with AppleMacSoft Graphic Converter. Just download the trial version and start the magic conversion.


